Integrate HF Spaces & Gradio with a React application
/ 3 min read
This article will provide a quick introduction to create & deploy a Machine Learning Model and to integrate with React application. Here is an overview of technologies we will be using
Hugging Face is a platform where we can host Machine Learning Models and Create Spaces to use them with any of the models available.
Gradio is a platform which enables to build user interfaces for interacting with or demoing our Machine Learning models.
Create a Space in Hugging Face
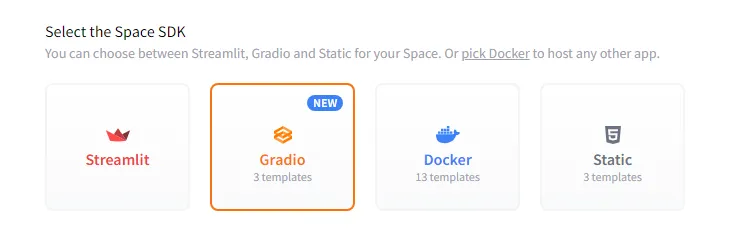
Let’s start by creating a space of hugging face here. Choose a name for the space and under Spaces SDK choose Gradio
You can leave the other options as default and proceed to create space. Clone the created spaces to your machine and create app.py with the following contents
import gradio as gr
def greet(name):    return "Hello " + name + "!!"
demo = gr.Interface(fn=greet, inputs="text", outputs="text")demo.launch()
Once these are are done, commit and push your changes to your space. Hugging face should build this automatically and shows the gradio interface of our app like this
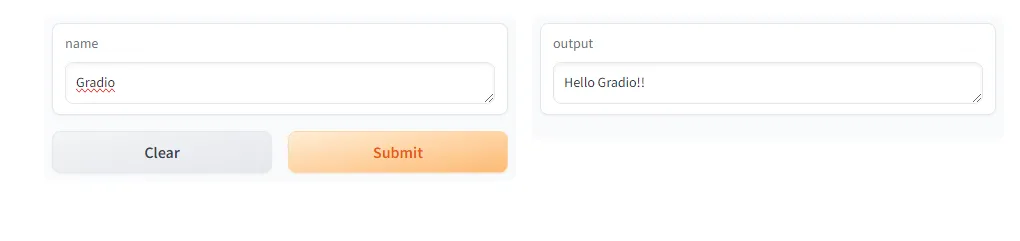
Now we have built a gradio app with basic interface and hosted it in hugging face spaces. Let’s look into extending the functionality our app in the next section.
Note: You need to create a write token here in order to push your changes to hugging face spaces
Create a Vision Classifier Model
We are going to use fast.ai to create a simple classification which predicts whether a given image is a cat or not.
First, let’s get path of the training images dataset. fast.ai provides lot of datasets already, we’ll use one from that. Here are the steps to train & export the model
# Read the dataset from fastai path = untar_data(URLs.PETS)/'images' dls = ImageDataLoaders.from_name_func(        path,get_image_files(path), valid_pct=0.2, seed=42,        label_func=is_cat, item_tfms=Resize(224))
# Train the model with vision_learner learn = vision_learner(dls, resnet34, metrics=error_rate) learn.fine_tune(1)
# Export the model learn.path = Path('.') learn.export( 'cats_classifier.pkl')
After you have run this, there should be a model file generated in the same directory. You can then use this for predictions.
model = load_learner('cats_classifier.pkl')
def predict(image):     img = PILImage.create(image)     _,_,probs = model.predict(img)     return {'Not a Cat':float("{:.2f}".format(probs[0].item())),            'Cat':float("{:.2f}".format(probs[1].item()))}
Then launch gradio using the predict method above
demo = gr.Interface(fn=predict, inputs=gr.Image(), outputs='label')demo.launch()To see your changes in action, push your changes to hugging face.
Note: Since the size of the generated model will be large, you need to use Git LFS to track the changes
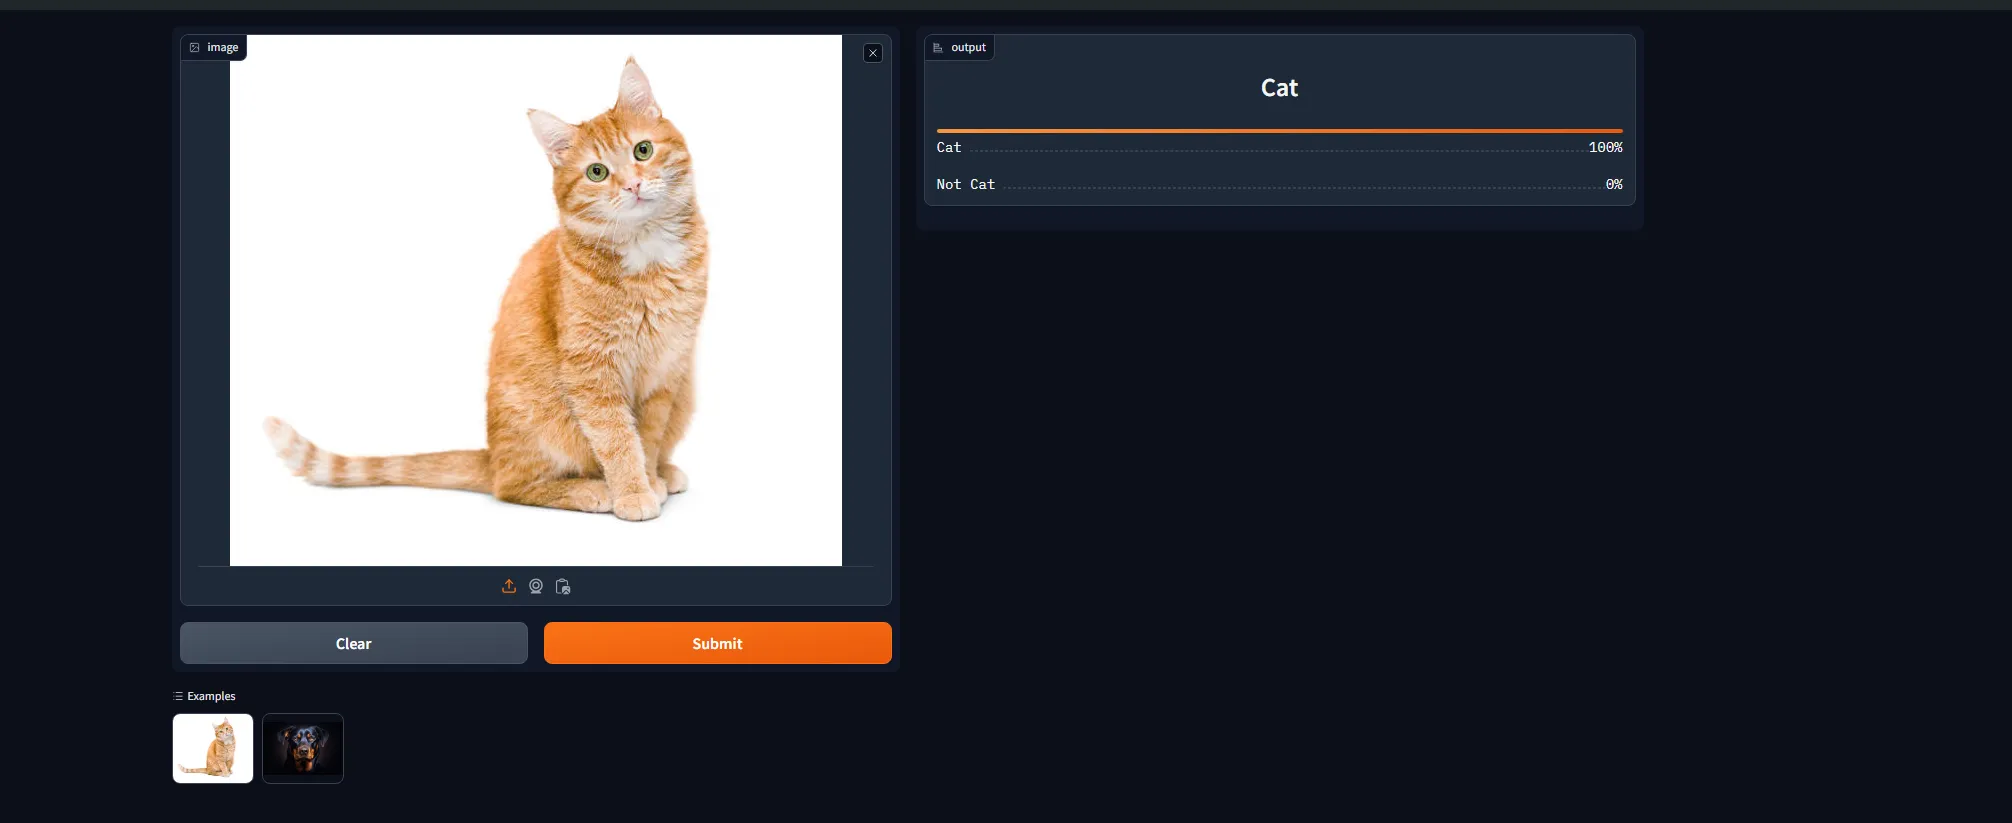
Then you should able to upload any image and find if its a cat or not
Integrate with React application
One of the advantages of using gradio is that, it gives us an API to access our model. We will look into how to integrate it with React.
If you scroll to bottom in our deployed model in hugging face, you can see a button called use via Api where you will find the details to connect to the api. We will be using @gradio/client package to connect to api. Here is the sample code to connect to model & get the results
import { Client } from "@gradio/client";
const response = await fetch( "https://raw.githubusercontent.com/gradio-app/gradio/main/test/test_files/bus.png",);
const exampleImage = await response.blob();
const client = await Client.connect("ganesh1410/basic-classifier");const result = await client.predict("/predict", { image: exampleImage,});
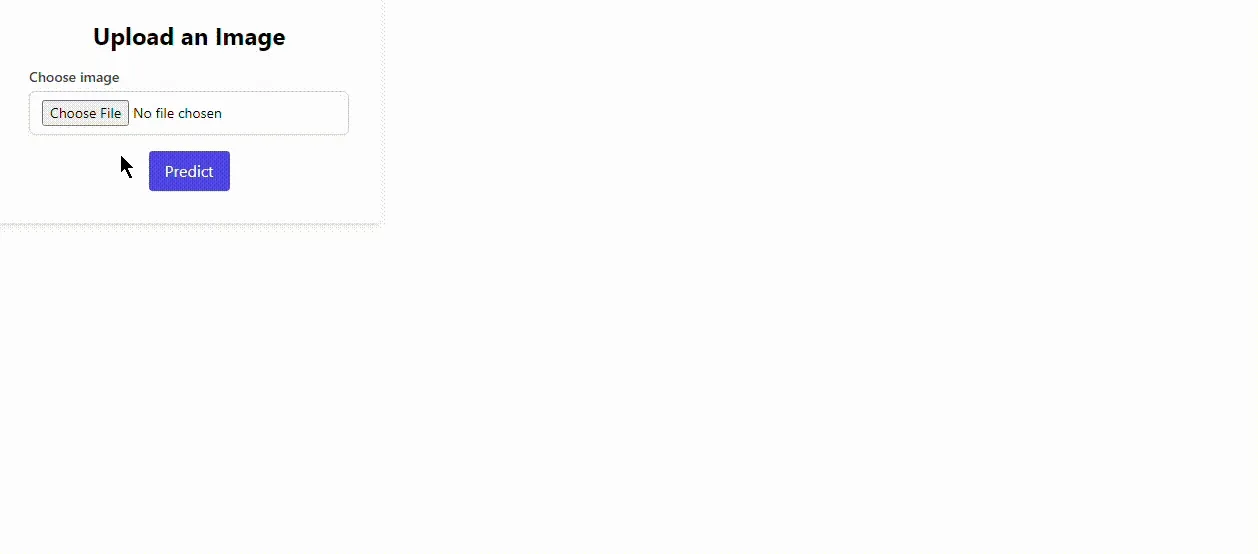
// This should have the label and confidencesconsole.log(result.data);You can see it in action for our model here
Here are the links for all the code & demo